Setup
Standard Oxygen Concentrator
Danger!
Oxygen causes rapid burning. Do not smoke while your oxygen concentrator is operating, or when you are near a person utilizing oxygen therapy. Do not use within 5ft (1.6M) of hot, sparking objects or naked sources of flame.
Important!
If you have a pre-existing heart or lung condition or any ailment that may affect your ability to process oxygen effectively, please consult a physician before use.
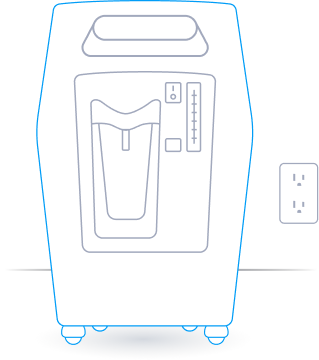
1. Choose a location
Make sure to give your unit some space (at least 6” on all sides), it needs to breathe too. Don’t plug it in just yet.
(Keep in mind you’ve got a 25ft extension tube)
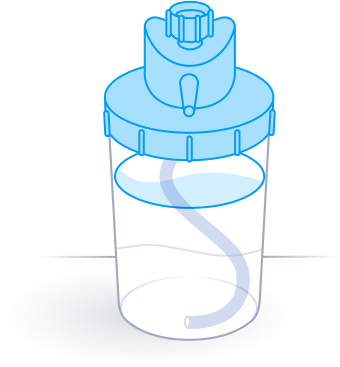
2. Let’s add some water
Remove the bubble humidifier from its packaging, you know, it’s the container with the blue cap!
Just pour the included purified water into the container and secure the lid.
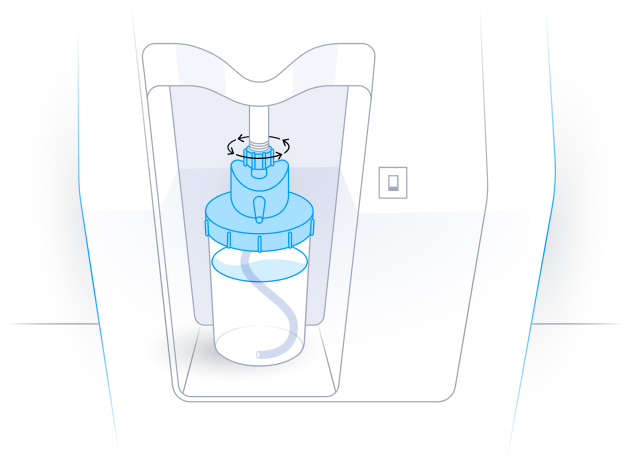
3. Hook it up
Thread the humidifier to the silver pipe on the front of the concentrator. Easy there tiger, don’t overtighten.

4. Go the distance
Attach the 25ft tube to your humidifier.
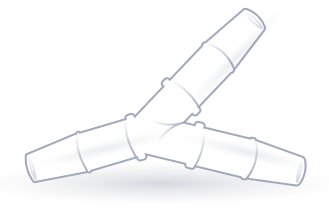
5. Table for 1 or 2?
Single user
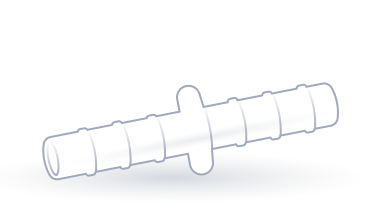
Attach straight connector to the other end of the 25ft tubing (if using one nasal cannula)
Two user
Attach Y connector to the other end of the 25ft tubing (If using two nasal cannulas)
This is your nasal cannula
(The thing that goes in your nose and around your ears)
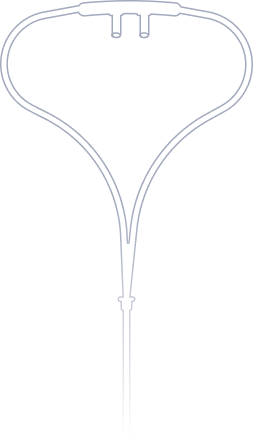
Attach the end of your nasal cannula(s) to the straight or Y connector
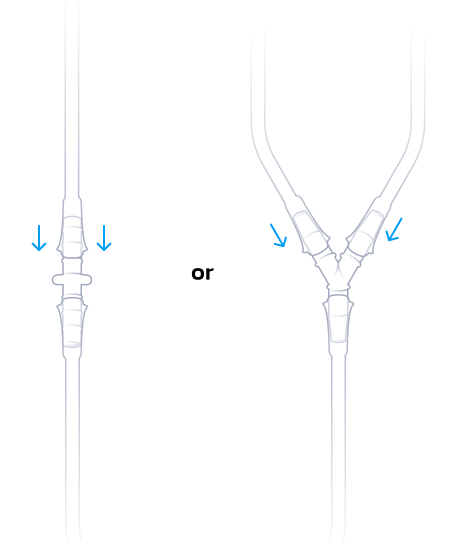
(We have included an optional 7ft extension if you are using the Y connector, just in case you need a little space from your friend)
Using a CPAP?
Using a CPAP with our units is simple
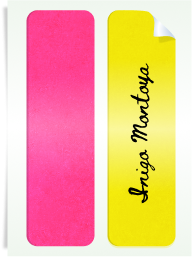
6. Mark your territory
Sharing is caring but not with cannulas. Use the included stickers to mark your name on and wrap around your cannula line.
7. Let’s keep it clean
When not in use, place the cannula on a clean paper towel or cloth. Another option would be to use a zip lock bag.
8. Plug it in, plug it in
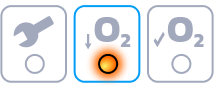
Time to plug this bad boy in. Once plugged in, flip the power switch on. It’s going to beep at you, it’s fine, that’s your concentrator saying hello. Use the dial on the right to adjust the oxygen flow to a value of 2. This is the proper setting for the unit to warm up and calibrate. The center light will glow an amber color as it warms up.
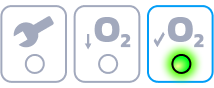
After a few minutes the center light will switch off and the right light will glow green. Green means go! Once green, you may move the dial up and down to your needs. Oxygen will be flowing through the cannulas.
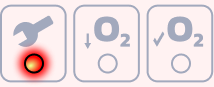
Seeing a red light?
If you are seeing a maintenance required light, set the oxygen flow to a value of 2, turn the unit off, then power the unit back on. When the light turns green, you may adjust as needed.
9. Adjust that flow
Use the dial on the right to adjust the amount of Oxygen. If you’re a single adult, set it to 2.5 for your beauty rest - do not exceed 3. If you’re sharing it with another user crank it up to 5. Need to catch your breath real quick between activities? - set it to 3.

10. Almost done!
With the cannula in front of you, gently insert the nasal prongs into your nose, wrap the tubing around your ears, and tighten the slide underneath your chin as desired. That’s it, you’re all set!
"Rest Easy", our oxygen concentrators were designed to operate all night long while you sleep.
Setup
Portable Oxygen Concentrator
Danger!
Oxygen causes rapid burning. Do not smoke while your oxygen concentrator is operating, or when you are near a person utilizing oxygen therapy. Do not use within 5ft (1.6M) of hot, sparking objects or naked sources of flame.
Important!
If you have a pre-existing heart or lung condition or any ailment that may affect your ability to process oxygen effectively, please consult a physician before use.
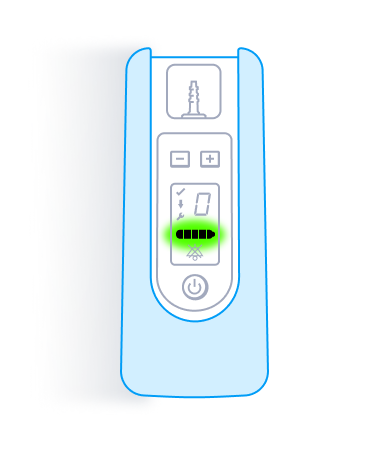
1. Charge it
Make sure you've got plenty of juice before you head out. 5 bars = fully charged.
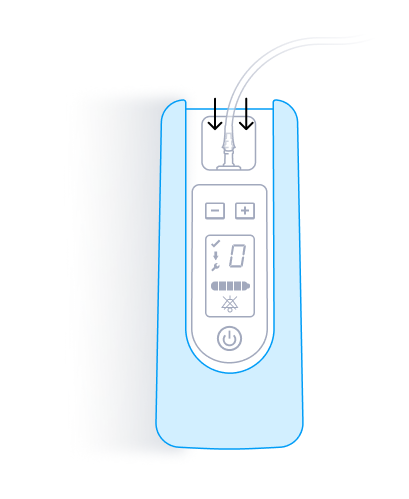
2. Hook it
Connect your nasal cannula to the oxygen outlet.
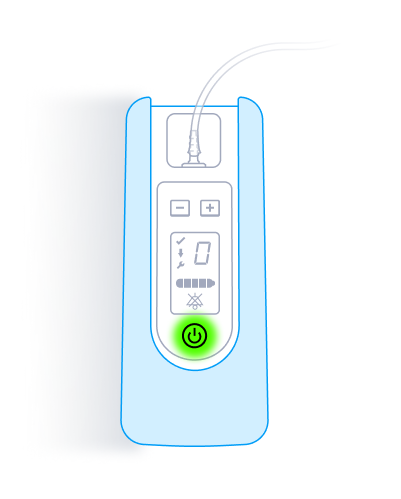
3. Power it
Press and hold the power button to turn the unit on.
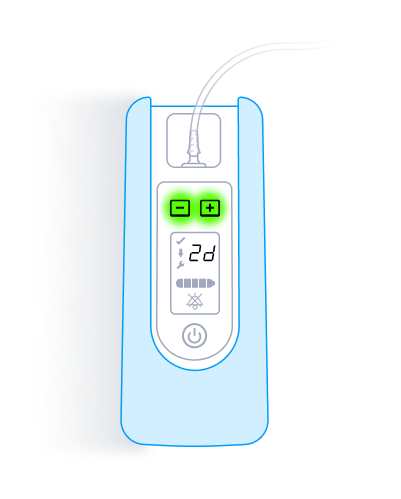
4. Bop it errrrr check the settings
Use the “+” and “-” keys to change the flow of oxygen. We recommend starting with 2d and not exceeding 3d.
5. Wear it
(The thing that goes in your nose and around your ears)
Setup
CPAP Instructions
1. Let's Get Started With Your CPAP
Instead of connecting a cannula, you’ll connect the bleed adapter (CPAP adapter). You can connect in the following ways:
- Connect it to the end of the 25 foot tube.
- Next an extra 7 foot? You can use a single adapter to connect a 7 foot tube to the end of the 25 foot and then connect the bleed adapter.
- Sharing? You can use a Y adapter off the 25 foot cable and then attach the 7 foot tube to the bleed adapter.
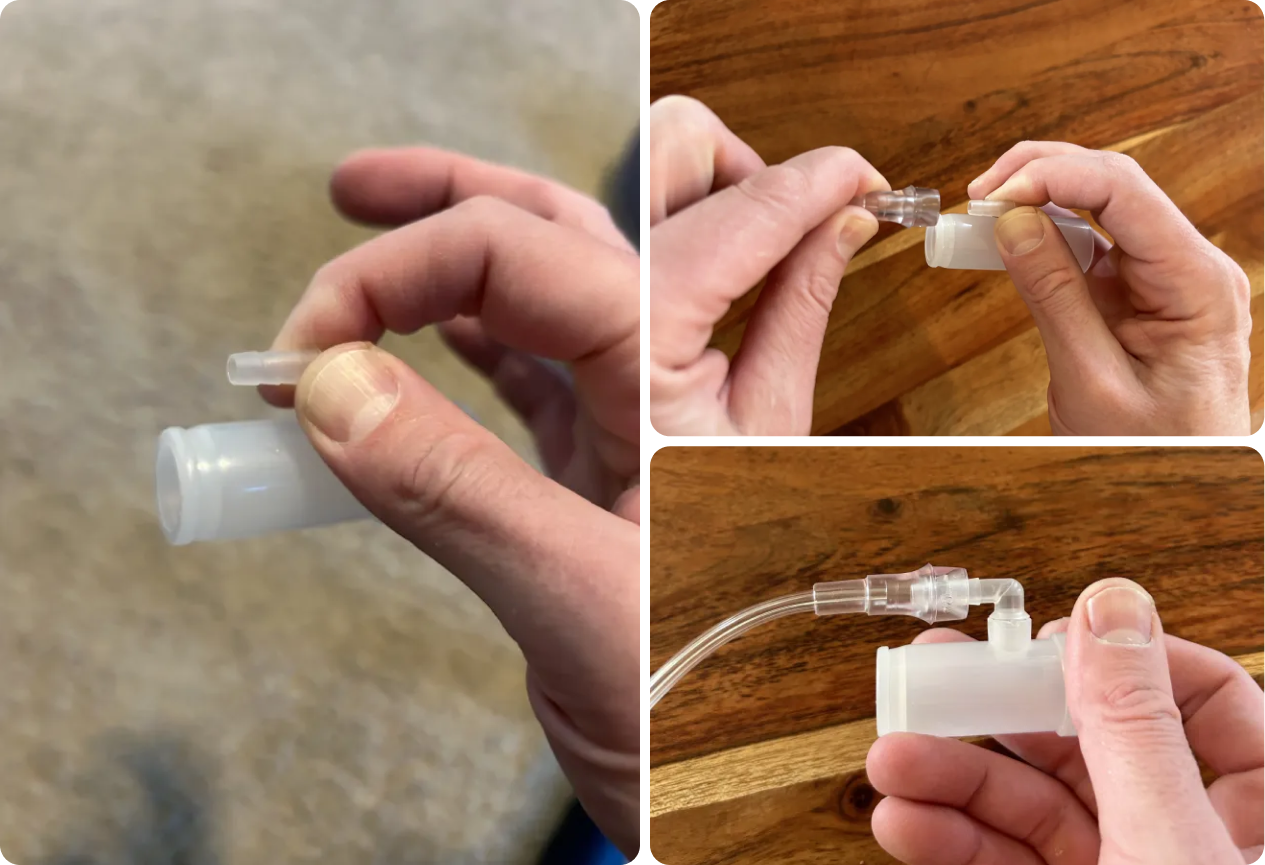
2. Bleed Adapter
Connecting the tube to the bleed adapter can be tricky because the port swivels. Hold the port between your thumb and index finger to hold in place and then attach the end of the tube. Give it some elbow grease - it’s a snug fit.
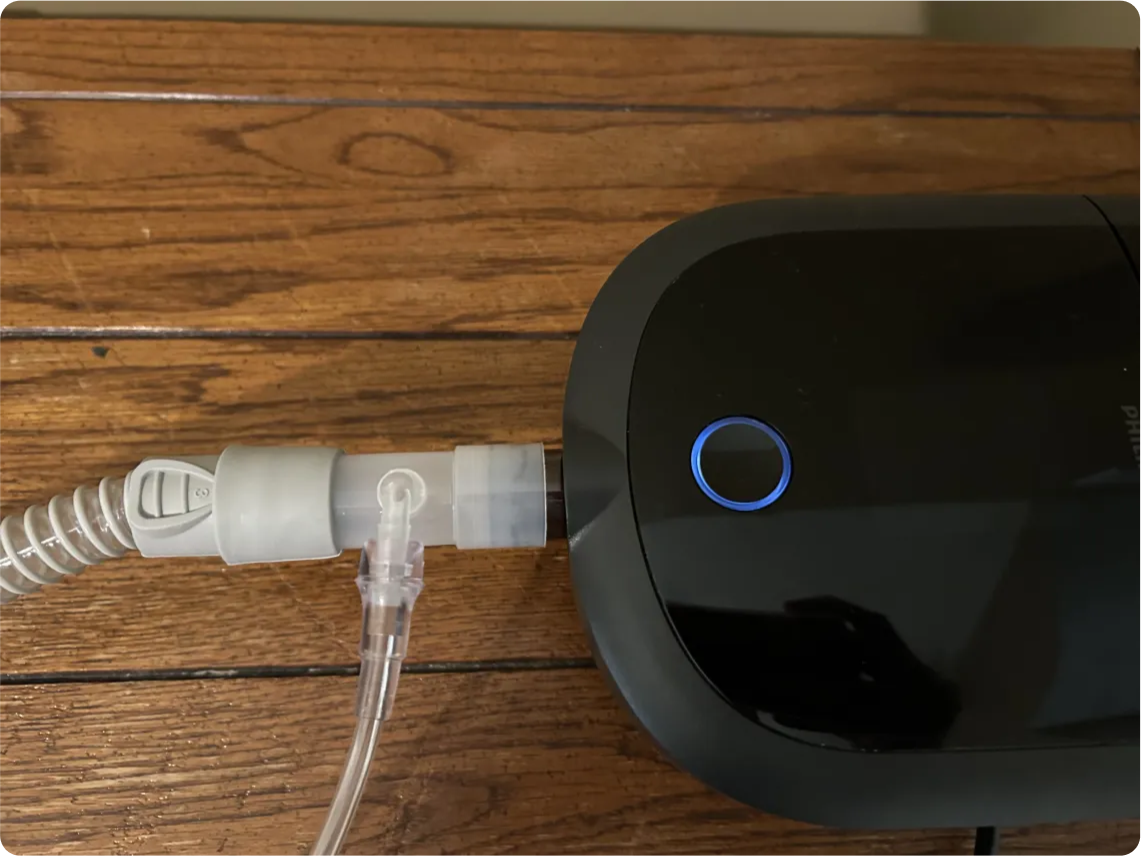
3. Which CPAP type do you have?
Connecting the bleed adapter will differ depending on your CPAP. On most units you will disconnect your CPAP hose (the hose that connects your mask to the CPAP) on the CPAP side, connect the bleed adapter to the CPAP, and lastly reconnect the CPAP hose to the other side of the bleed adapter. NOTE: You may need to connect the bleed adapter on the end of the CPAP hose between where your hose and mask currently connect.
4. You just setup your CPAP with our Oxygen Concentrator
Now you can be confident knowing you’re breathing that sweet Bluebird air through your CPAP.